
The Sneaky Power of the Bearish Flag on GBPNZD (And How It Outsmarts Most Traders)
Imagine this: you’re on a perfectly good hike, but you miss the trail marker and take the scenic route—aka the path straight into a bush. That, my friend, is what trading GBPNZD without understanding the bearish flag feels like.
In this article, we’re diving headfirst into the wonderfully deceptive world of the bearish flag pattern on GBPNZD, a pair known for its dramatic flair and tendency to move like it’s auditioning for a soap opera. From expert quotes to case studies, hidden patterns to underground tactics—this isn’t just another generic guide. It’s a tactical blueprint for spotting what most traders miss.
Let’s unravel the curtain on this underrated weapon, and see how you can trade it with the elegance of a chess master (and none of the drama of a failed sitcom).
When the Flag Looks Friendly But Packs a Punch
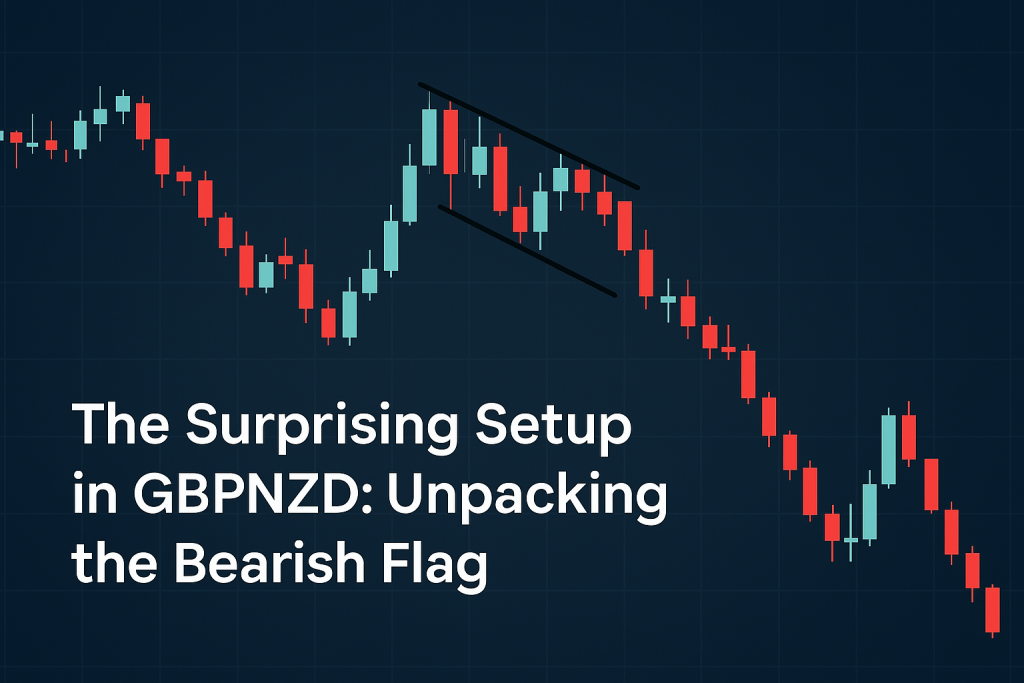
At first glance, the bearish flag pattern is as harmless as a nap on a rainy day. Price shoots down, then consolidates upward in a tight little channel, waving its little flag like everything’s fine. Spoiler alert: it’s not.
This pattern lures unsuspecting traders into thinking the trend is reversing. But really? It’s just catching its breath before crashing down harder than your favorite crypto on a bad news day.
What makes it especially dangerous (and valuable) on GBPNZD is the pair’s volatility. This currency duo’s high beta and strong reaction to risk sentiment make it perfect for sharp, rapid breakdowns—once that flag breaks, it doesn’t just drift. It dives.
The Silent Clue Most Miss: Volume Disguises
Let’s get technical. Most people look for a clean flag: descending volume in the consolidation, a breakout with a volume surge. But here’s the kicker—on GBPNZD, volume can be sneaky. According to a 2024 study by the Bank for International Settlements, GBP and NZD have irregular sessional volatility due to time-zone mismatches and economic cycle divergence. Translation? You may not get textbook volume signals.
Insider Tip: Instead of fixating on volume, monitor candle size and wick frequency during the flag. GBPNZD is notorious for fakeouts—but long upper wicks in the flag zone are your best friend. They’re like the friend who warns you about your ex before you get burned again.
Real Traders, Real Wisdom
Trading legend Linda Raschke once said, “The best patterns are the ones everyone stops believing in.” This couldn’t be truer for the bearish flag on GBPNZD. With algo-driven markets flooding basic setups, the subtleties matter more than ever.
Meanwhile, according to John Kicklighter, Chief Strategist at DailyFX, “GBPNZD is a sentiment-rich pair. When risk-off hits and the Kiwi gets dumped, bearish continuation patterns become explosive.”
If Raschke and Kicklighter had a trading baby, it would probably short the flag breakdown and take profit before the amateurs finish drawing trendlines.
Flag Pattern or Fancy Bull Trap? Here’s the Litmus Test
So how do you know it’s a real bearish flag and not some price action cosplay?
Here’s the 5-Step Ninja Checklist:
- Impulse Leg: Look for a clean, aggressive bearish move. If the initial drop looks like it got pushed off a cliff? You’re onto something.
- Parallel Channel Up: The flag should slope upward, not sideways or messy. Clean lines = clean setups.
- Lower Volume / Smaller Candles: As mentioned, look at wick traps and decreasing momentum.
- Break Below the Flag with Momentum: This is your cue to strike—bonus points if it happens during London open.
- Confirm with ATR or CCI: Use Average True Range or Commodity Channel Index to confirm declining momentum within the flag and spike on breakout.
The Forgotten Trigger: News-Driven Breakdown Zones
Most traders play checkers while this pair plays 4D chess. One major missed edge? Timing the bearish flag around economic catalysts.
In March 2024, GBPNZD formed a picture-perfect flag—just before NZ GDP came in at -0.4% quarter-over-quarter. Boom. 180+ pip drop in 4 hours.
Tactical Play:
- Track UK and NZ macro events (employment, GDP, inflation)
- Use StarseedFX’s real-time calendar at Forex News Today
- Be in position before the news, not after the breakout
Inside the Underground: Flag Cloning Strategy
Want next-level ninja status? Start “cloning” previous flag structures on GBPNZD—literally copy and paste the last flag’s structure and project it onto the next consolidation zone.
According to a 2023 white paper by QuantInsti, fractal behavior in minor pairs like GBPNZD can offer 7-15% predictive edge when previous consolidation patterns are aligned with momentum oscillators.
Steps:
- Screenshot the last successful bearish flag
- Overlay onto current price action
- Align with a 20-period EMA slope and OBV divergence
You’re not predicting the future, you’re anticipating behavior. Big difference.
How to Avoid the Rookie Trap (AKA the “False Break Buffet”)
The false breakout is a rite of passage. But you don’t need to keep paying tuition.
Here’s what separates pro-level entries:
- Don’t enter on the first break; wait for a close below the flag on the 1H or 4H
- Use Smart Trading Tool to auto-calculate optimal position size with low risk
- Confirm with OBV (On Balance Volume) or DMI to validate trend strength
Let’s Talk Risk (Without Killing the Vibe)
A good setup can still go bad. That’s not your fault—that’s Forex. But trading GBPNZD flags without a risk plan? That’s like riding a rollercoaster without a seatbelt. Fun for 3 seconds. Then terrifying.
Use our Free Trading Plan to:
- Define entry and exit zones
- Set pip-based stop loss thresholds
- Track historical success rate of flag setups
Access here: Free Trading Plan
And track your setups with the Free Trading Journal to level up like a data-driven Jedi.
Strategic Takeaways in a Nutshell
- GBPNZD flags = emotional traps in disguise
- Focus on candle structure and wick signals over volume
- Use economic catalysts to time the breakdown
- Clone previous flag structures for anticipatory setups
- Filter breakouts with DMI, OBV, or CCI confirmation
- Avoid the first breakout candle like it owes you money
—————–
Image Credits: Cover image at the top is AI-generated
PLEASE NOTE: This is not trading advice. It is educational content. Markets are influenced by numerous factors, and their reactions can vary each time.

Anne Durrell & Mo
About the Author
Anne Durrell (aka Anne Abouzeid), a former teacher, has a unique talent for transforming complex Forex concepts into something easy, accessible, and even fun. With a blend of humor and in-depth market insight, Anne makes learning about Forex both enlightening and entertaining. She began her trading journey alongside her husband, Mohamed Abouzeid, and they have now been trading full-time for over 12 years.
Anne loves writing and sharing her expertise. For those new to trading, she provides a variety of free forex courses on StarseedFX. If you enjoy the content and want to support her work, consider joining The StarseedFX Community, where you will get daily market insights and trading alerts.
Share This Articles
Recent Articles
The GBP/NZD Magic Trick: How Genetic Algorithms Can Transform Your Forex Strategy
The British Pound-New Zealand Dollar: Genetic Algorithms and the Hidden Forces Shaping Currency Pairs
Chande Momentum Oscillator Hack for AUD/JPY
The Forgotten Momentum Trick That’s Quietly Dominating AUD/JPY Why Most Traders Miss the Signal
Bearish Market Hack HFT Firms Hope You’ll Never Learn
The One Bearish Market Hack High Frequency Traders Don't Want You to Know The
