
Trading AUD/USD with the Head and Shoulders Pattern: The Ultimate Playbook
Alright, let’s talk about one of the most iconic chart patterns out there—the Head and Shoulders. If you think I’m talking about shampoo, we’re going to need a little course correction. We’re diving into trading AUD/USD using this bad boy of a pattern, which could be your key to finally riding those sweet reversal waves without getting swept under like the ill-fated hero of a beach movie.
Trading AUD/USD with the head and shoulders pattern can be both satisfying and profitable—kind of like buying something you don’t need during a sale, but realizing later it was actually an awesome deal. You might feel a bit hesitant when you first see the pattern forming, but let me tell you, if you spot it right, it’s like seeing the dollar store restock your favorite candy. You don’t hesitate—you take action.
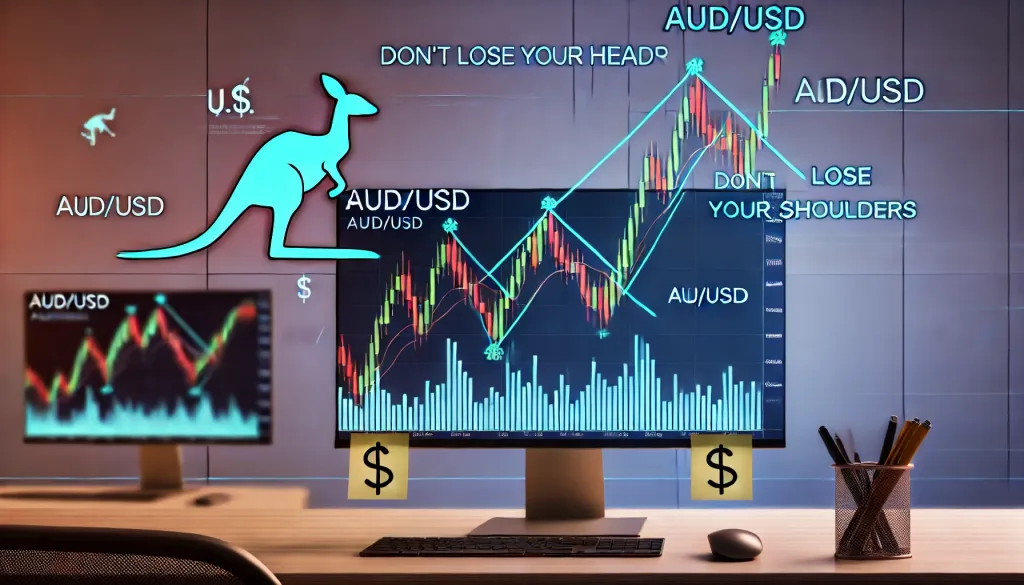
What Exactly Is a Head and Shoulders Pattern, Anyway?
Imagine someone standing with their head high and their two shoulders level on each side. That’s the literal shape of the pattern. In the trading world, it represents a peak in price (the “head”) between two lower peaks (the “shoulders”). When you see this form in a bullish trend, it’s typically a sign of exhaustion, hinting at a potential reversal. Essentially, AUD/USD has tried to hit the gym, flex its biceps, and failed—time to rest up or change course.
The head and shoulders pattern is an easy-to-spot formation that provides a great opportunity to enter short positions when it shows up at the end of a bullish trend. But before you start hitting that “sell” button like it’s the emergency exit of a rollercoaster gone rogue, let’s understand how you can use this to maximize your gains.
The Anatomy of a Perfect Head and Shoulders Trade
To master trading AUD/USD with this pattern, you need to understand its different parts:
- Left Shoulder: The market moves upwards, reaches a peak, and pulls back. This is like the market getting a little too overconfident and realizing it might need a breather.
- Head: The price then moves up again, reaching a higher peak. This is when everyone thinks AUD/USD is about to get ripped like Thor before a Marvel movie, but spoiler—it’s not.
- Right Shoulder: The market again moves down, recovers, but only enough to form a peak lower than the head. Imagine AUD/USD trying to do a push-up but getting tired halfway through. That’s the right shoulder.
- Neckline: This is a key support level that connects the troughs between the head and shoulders. Once price breaks this line, it’s the market waving a white flag—a signal that reversal is likely in full swing.
Hidden Tactics to Enhance Your Head and Shoulders Strategy
1. Measure Twice, Trade Once: Calculating Target Price
Here’s a secret weapon to put in your trading arsenal: measure the height from the head to the neckline, and project that distance downward to get your target price. Imagine you’re measuring for a new bookshelf. You wouldn’t just eyeball it and hope for the best—not unless you like chaotic decor. Similarly, by measuring the head to neckline, you get an approximate target that ensures you’re not just randomly aiming for profit.
2. Volume Matters: Pay Attention
The best head and shoulders setups are confirmed with decreasing volume on each shoulder and an increase when breaking the neckline. It’s like a bad breakup—everyone sees the writing on the wall, but it isn’s not final until someone makes a big scene (in our case, volume surge) while walking out. If you notice volume decreasing throughout the pattern and then popping on the neckline break, that’s your cue.
3. Stop-Loss Placement: Avoiding the Pitfalls
A common mistake traders make is putting their stop losses way too tight. You don’t want to be the person who sells everything in panic because your roommate used your fancy shampoo. Place your stop loss above the right shoulder to give the trade enough room to breathe, avoiding unnecessary trigger points.
Expert Insights to Boost Your Game
Now, I wouldn’t leave you without some expert backing. According to renowned trader and author Alexander Elder, head and shoulders is one of the most reliable patterns, particularly when accompanied by volume confirmation. He says, “Volume confirms the move—watch it closely.” This speaks to the importance of pairing volume analysis with the pattern for a high-probability setup.
And, let’s not forget Kathy Lien, who noted, “Using the head and shoulders alongside fundamental cues, such as interest rate differentials, can improve your trade outcome significantly.” This means that if you see a head and shoulders forming, and it’s happening around the time Australian interest rates look weak—well, that’s like having a cheat code for AUD/USD trades.
The Contrarian Approach: Why You Shouldn’t Always Follow the Crowd
A lot of traders assume that just because they spot a head and shoulders, it’s time to jump in. But here’s the catch—context matters. If the broader trend is overwhelmingly bearish, and you see a head and shoulders forming, you need to be cautious. Going short on a reversal in an already bearish environment might mean you’re entering too late to the party, or worse, you’re standing at the buffet line when everyone else has already gone home.
A great contrarian move is to use head and shoulders as a confirmation tool, rather than as your initial trigger. Wait for a retest of the neckline to validate your entry. Remember, patience in trading isn’t just a virtue—it’s the difference between making money and losing it.
How to Execute a Flawless Trade Using the Head and Shoulders on AUD/USD
- Identify the Pattern: Make sure all three parts—the left shoulder, head, and right shoulder—are well-defined. No half-baked formations.
- Watch the Volume: Observe whether volume declines during the formation and spikes upon breaking the neckline.
- Set Your Entry: Wait for a break below the neckline, and ideally for a retest before entering. No one likes to buy something on impulse, only to find out it was cheaper the next day—patience pays.
- Place Stop Loss Above the Right Shoulder: Give your trade room to breathe, but don’t give it so much room it takes up residence and eats all your snacks.
- Calculate Target Price: Use the head-to-neckline height to determine where you should be taking profit.
Elite Tactics for Maximum Profit
- Combine with Fundamentals: Use economic data releases that impact the Australian Dollar—such as employment reports or interest rate decisions—to validate the head and shoulders formation.
- Retest is Key: Don’t rush into a trade simply because the neckline broke. The most reliable trades often happen after a retest of the neckline, confirming prior support as resistance.
- Volume Confirms Price: Trust volume to tell you if the break is real. No volume means no conviction.
Want to dive deeper into these kinds of setups? Join our community at StarseedFX, where we dissect real-time charts, share actionable insights, and offer hidden tactics every day. Because, let’s face it, trading without backup is like trying to win a chess game blindfolded—sure, it can be done, but why make it harder than it needs to be?
So, in conclusion, the head and shoulders pattern is a powerful tool for trading AUD/USD, especially if you blend it with volume analysis and fundamental cues. This isn’t just about spotting a pattern; it’s about knowing when to act, when to wait, and when to hit that trade with confidence.
Happy trading, and may all your head and shoulders (patterns) bring you profits, not dandruff!
—————–
Image Credits: Cover image at the top is AI-generated
PLEASE NOTE: This is not trading advice. It is educational content. Markets are influenced by numerous factors, and their reactions can vary each time.

Anne Durrell & Mo
About the Author
Anne Durrell (aka Anne Abouzeid), a former teacher, has a unique talent for transforming complex Forex concepts into something easy, accessible, and even fun. With a blend of humor and in-depth market insight, Anne makes learning about Forex both enlightening and entertaining. She began her trading journey alongside her husband, Mohamed Abouzeid, and they have now been trading full-time for over 12 years.
Anne loves writing and sharing her expertise. For those new to trading, she provides a variety of free forex courses on StarseedFX. If you enjoy the content and want to support her work, consider joining The StarseedFX Community, where you will get daily market insights and trading alerts.
Share This Articles
Recent Articles
The GBP/NZD Magic Trick: How Genetic Algorithms Can Transform Your Forex Strategy
The British Pound-New Zealand Dollar: Genetic Algorithms and the Hidden Forces Shaping Currency Pairs
Chande Momentum Oscillator Hack for AUD/JPY
The Forgotten Momentum Trick That’s Quietly Dominating AUD/JPY Why Most Traders Miss the Signal
Bearish Market Hack HFT Firms Hope You’ll Never Learn
The One Bearish Market Hack High Frequency Traders Don't Want You to Know The
