
NZDCAD Descending Triangle: The Hidden Formula Only Experts Use
The Overlooked Power Play: NZDCAD and the Descending Triangle
Most traders treat the NZDCAD pair like an old gym membership—something they signed up for but never use. However, if you know where to look, this often-ignored currency pair hides some of the best technical setups in the game. One such setup? The descending triangle—a pattern that’s got more predictive power than a fortune teller on a caffeine high.
If you’re trading NZDCAD and not using descending triangles, you’re basically driving blindfolded in a Formula 1 race. Let’s break down why this pattern is one of the most reliable structures in Forex and how you can profit from it like a seasoned pro.
Why Most Traders Get This Wrong (And How You Can Avoid It)
First, let’s address the elephant in the room—many traders butcher their descending triangle setups because:
- They don’t confirm the breakdown.
- They misinterpret volume trends.
- They panic and exit too soon (classic case of cold feet!).
Instead of treating a descending triangle like a guaranteed jackpot, let’s take a more surgical approach to ensure we squeeze maximum profit from this setup.
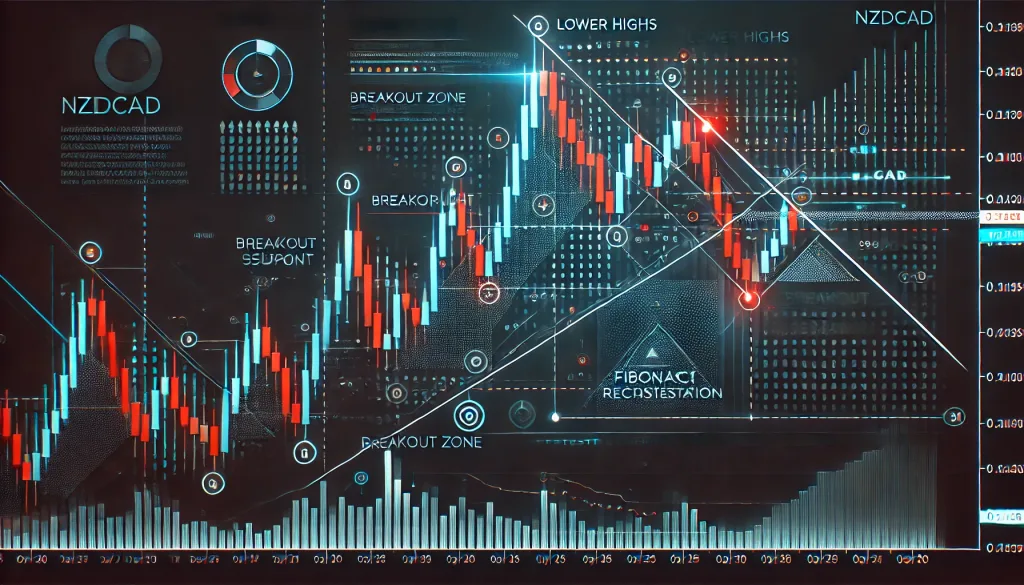
Step 1: Spotting the Perfect Descending Triangle on NZDCAD
A descending triangle is formed when:
- Lower highs indicate selling pressure.
- A flat support level holds until price action tests it repeatedly.
- A breakout below support typically signals further downside.
Here’s how to ensure you’re dealing with a high-probability triangle:
- Three or more touches on support? ✅ Strong setup.
- Progressively lower highs? ✅ Sellers are flexing their muscles.
- Tightening range? ✅ Pressure is building, breakout is near.
Pro Tip: Don’t force triangles where they don’t exist. If it looks like a Picasso painting instead of a well-defined triangle, walk away.
Step 2: The Smart Entry Strategy Most Traders Miss
The impatient trader jumps in too soon. The smart trader waits. The real genius? Uses a two-tier entry strategy.
Here’s how you do it:
- Tier 1 Entry: Enter on the breakdown of support with a tight stop-loss above the last lower high.
- Tier 2 Entry: Enter on the retest of the broken support (now resistance) for extra confirmation.
Why this works: It lets you profit from both the initial breakdown and the retest without risking a premature entry.
Pro Tip: Don’t chase the move if the candle closes too far from support—this is where “FOMO traders” get wrecked.
Step 3: Stop-Loss and Take-Profit—The Non-Negotiables
Risk management isn’t just a suggestion—it’s the law.
- Stop-Loss Placement: Place it just above the last lower high (~15-25 pips above resistance).
- Take-Profit Target: Measure the height of the triangle and project it downward from the breakout point.
- Bonus Move: Scale out at major Fibonacci levels (38.2% and 61.8%) for safer profits.
If you trade without a stop-loss, you’re playing Russian roulette with your account balance. Use it. Always.
Why the Descending Triangle Works So Well on NZDCAD
The NZDCAD pair has one key characteristic that makes the descending triangle exceptionally reliable: It follows strong macro trends driven by commodity movements (New Zealand exports vs. Canada’s oil-driven economy).
Historically, NZDCAD’s descending triangle breakouts have resulted in prolonged trends due to these external factors. When you align technical setups with fundamental backing, you’ve got yourself a high-confidence trade.
Final Thoughts: The Hidden Edge Most Traders Ignore
So, what separates the winning traders from the rest?
- Patience – Waiting for confirmation before entering.
- Precision – Using technical analysis correctly.
- Risk Management – Never going in blind.
Most traders fail because they think trading is about finding a million strategies. It’s not. It’s about mastering a few and executing them flawlessly.
Want to level up your game? Get real-time insights and exclusive trading strategies from the experts at StarseedFX. Join the community and start trading smarter today!
—————–
Image Credits: Cover image at the top is AI-generated
PLEASE NOTE: This is not trading advice. It is educational content. Markets are influenced by numerous factors, and their reactions can vary each time.

Anne Durrell & Mo
About the Author
Anne Durrell (aka Anne Abouzeid), a former teacher, has a unique talent for transforming complex Forex concepts into something easy, accessible, and even fun. With a blend of humor and in-depth market insight, Anne makes learning about Forex both enlightening and entertaining. She began her trading journey alongside her husband, Mohamed Abouzeid, and they have now been trading full-time for over 12 years.
Anne loves writing and sharing her expertise. For those new to trading, she provides a variety of free forex courses on StarseedFX. If you enjoy the content and want to support her work, consider joining The StarseedFX Community, where you will get daily market insights and trading alerts.
Share This Articles
Recent Articles
The GBP/NZD Magic Trick: How Genetic Algorithms Can Transform Your Forex Strategy
The British Pound-New Zealand Dollar: Genetic Algorithms and the Hidden Forces Shaping Currency Pairs
Chande Momentum Oscillator Hack for AUD/JPY
The Forgotten Momentum Trick That’s Quietly Dominating AUD/JPY Why Most Traders Miss the Signal
Bearish Market Hack HFT Firms Hope You’ll Never Learn
The One Bearish Market Hack High Frequency Traders Don't Want You to Know The
